The idea of building a personal website—in the past, I might have asked:
- What’s the use?
- What would I write?
- Would anyone read it?
But recently, my perspective has changed:
- I’ve clicked into personal websites multiple times, read brilliant articles, then couldn’t resist browsing other posts and learning about the author through their bio page.
- I’ve also come across Timothy Ferriss’ video on speed-reading techniques on X, then discovered his books and podcast through his personal website, eventually reading his decade-old bestseller The 4-Hour Workweek.
Now, I see the value of a personal website in:
- Showcasing your thoughts, insights, and achievements—otherwise, these valuable things might only impact family, friends, and colleagues
- Maintaining it is a long-term compounding behavior that accumulates your moments of inspiration and brilliance throughout life, without being erased by a job change or move
- It’s a window to connect with the world
But with so many social media platforms and blog sites available, why build your own? I believe they aren’t mutually exclusive—we can use both. However, personal websites have advantages:
- You don’t rely on any platform—it’s exclusively yours
- You can customize its theme and format to reflect your unique taste
- You have full control over what features to add, how to deploy it, and what domain to use
Of course, this requires some programming skills. Fortunately, programmers are incredibly generous, offering many useful frameworks for free with detailed documentation. Building a website today isn’t that complicated. Let’s get started.
Technology Selection
My background is primarily in backend development. While I have some frontend knowledge, this is my first time building a website from scratch. I started by looking for best practices. When I asked ChatGPT, it replied:
Decide what your website is for:
Portfolio/resume?
Blog?
Project showcase?
Contact information?
Good question. I think a blog best fits my vision for a personal site. By the way, I usually ask technical questions in English, hence ChatGPT’s English reply. It then listed some frameworks:
Static Site Generators:
- Astro – modern, fast, great for blogs.
- Hugo – fast, Go-based.
- Jekyll – used with GitHub Pages.

No-code/low-code options:
- Notion + Super.so
- Wix, Carrd
First, no-code/low-code options are out. “Static Site Generators” was a new term, but self-explanatory—since a blog without user logins or comments only needs to display text and images, all content is static, eliminating the need for backend services or databases. Googled “Static Site Generators” and found https://jamstack.org/generators/ listing many common frameworks:
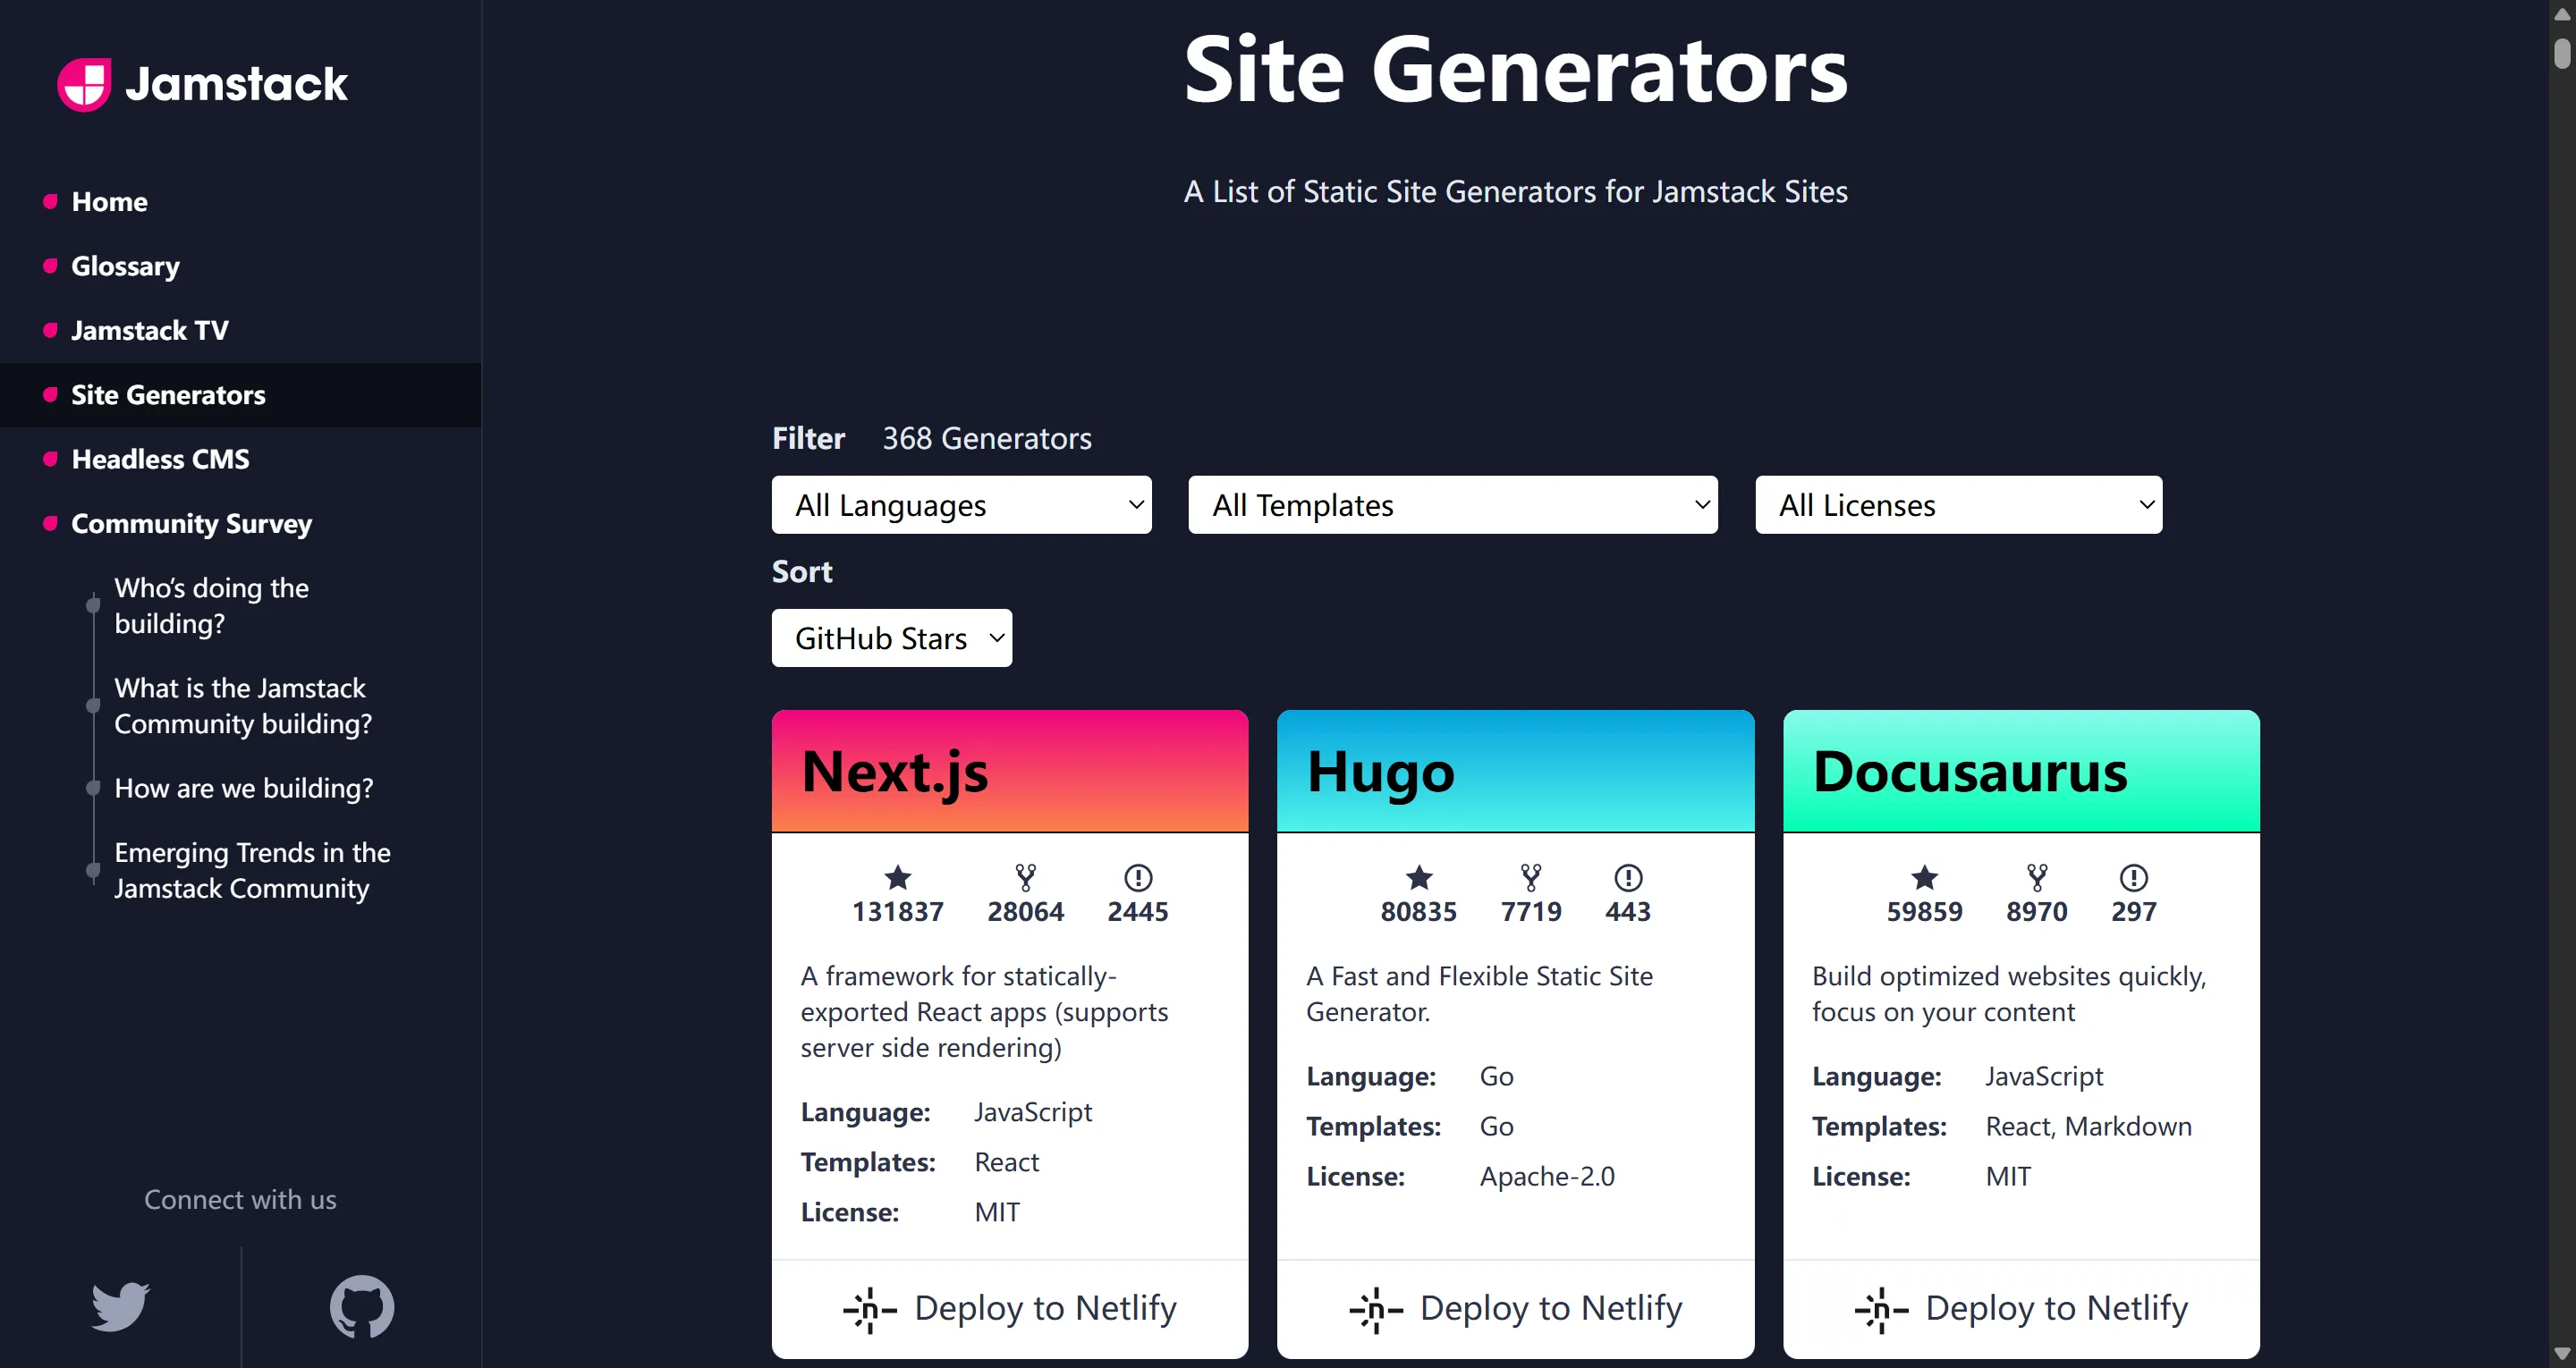 I shortlisted four popular ones:
- Astro
- Hugo
- Gatsby
- Jekyll
Used https://www.star-history.com/ to compare their GitHub Star trends:
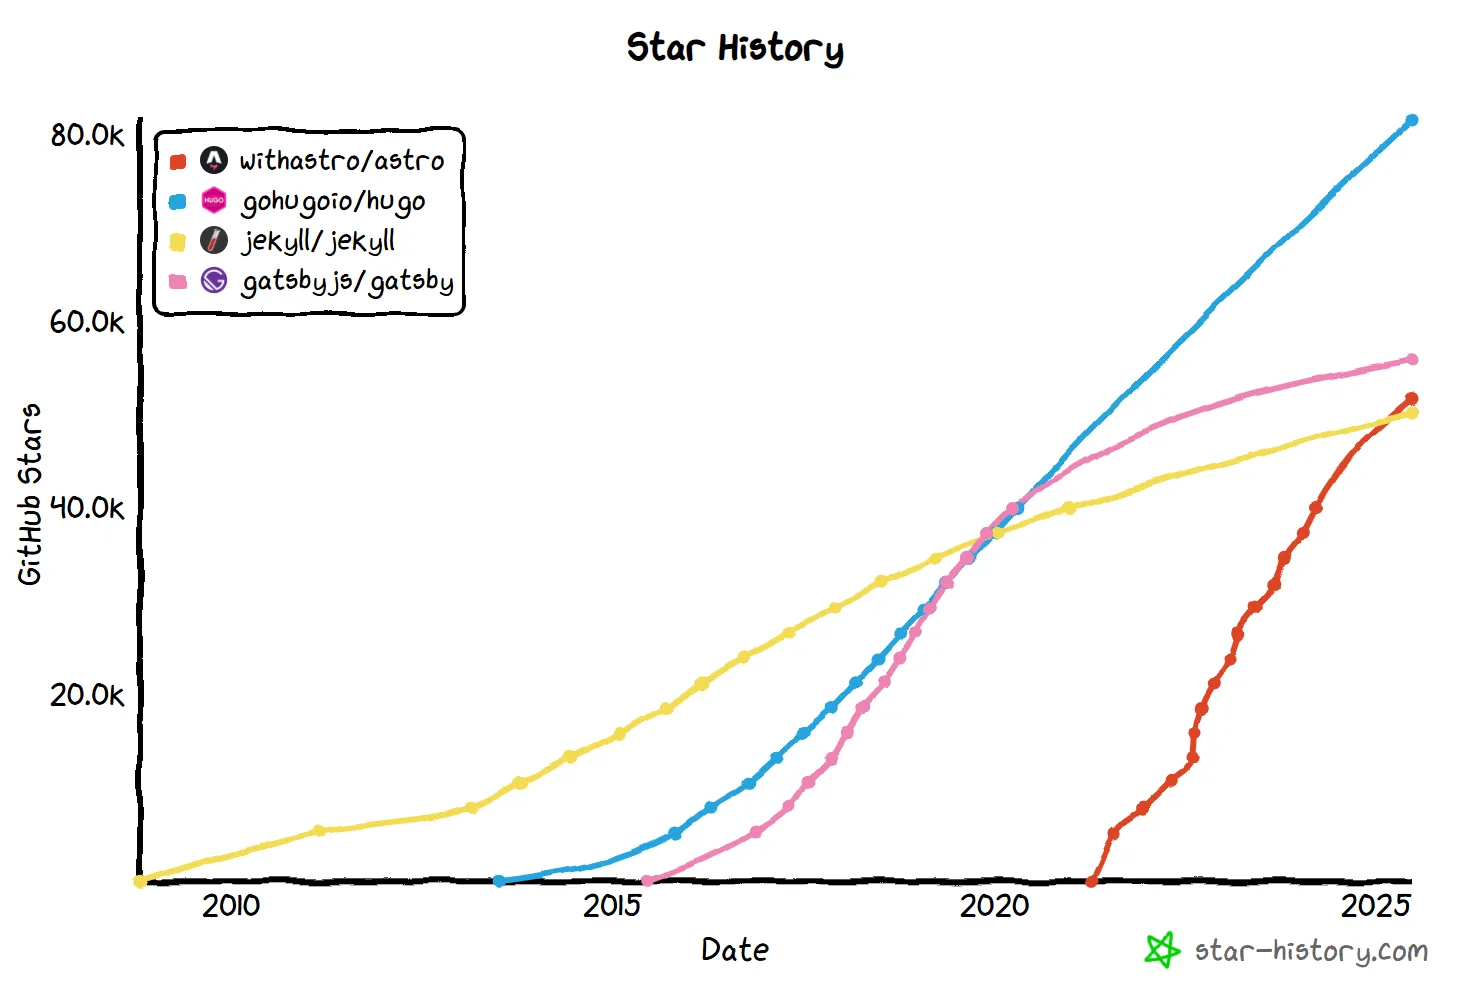 Astro is the newest and fastest-growing—let’s go with that.
Astro
Getting Started
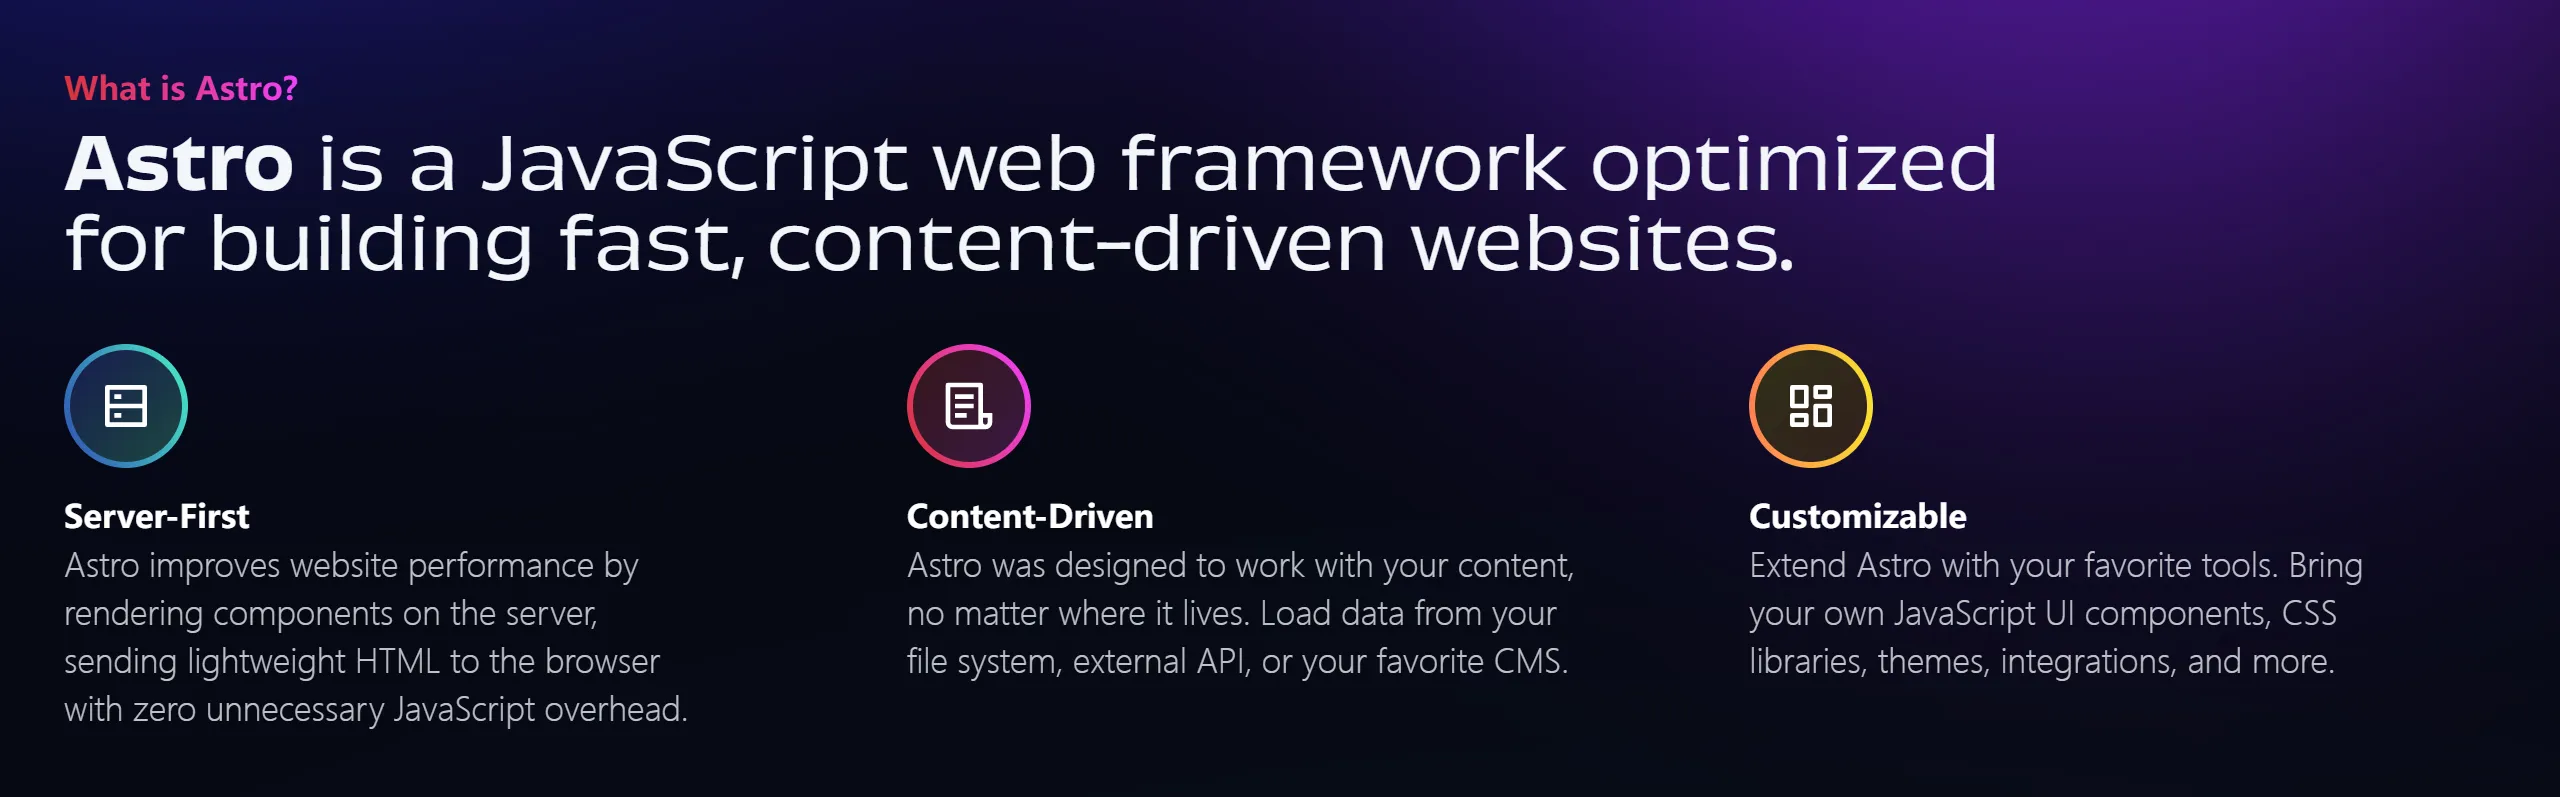 Astro’s official website highlights its features:
- Server-side rendering
- Content-driven
- Customizable
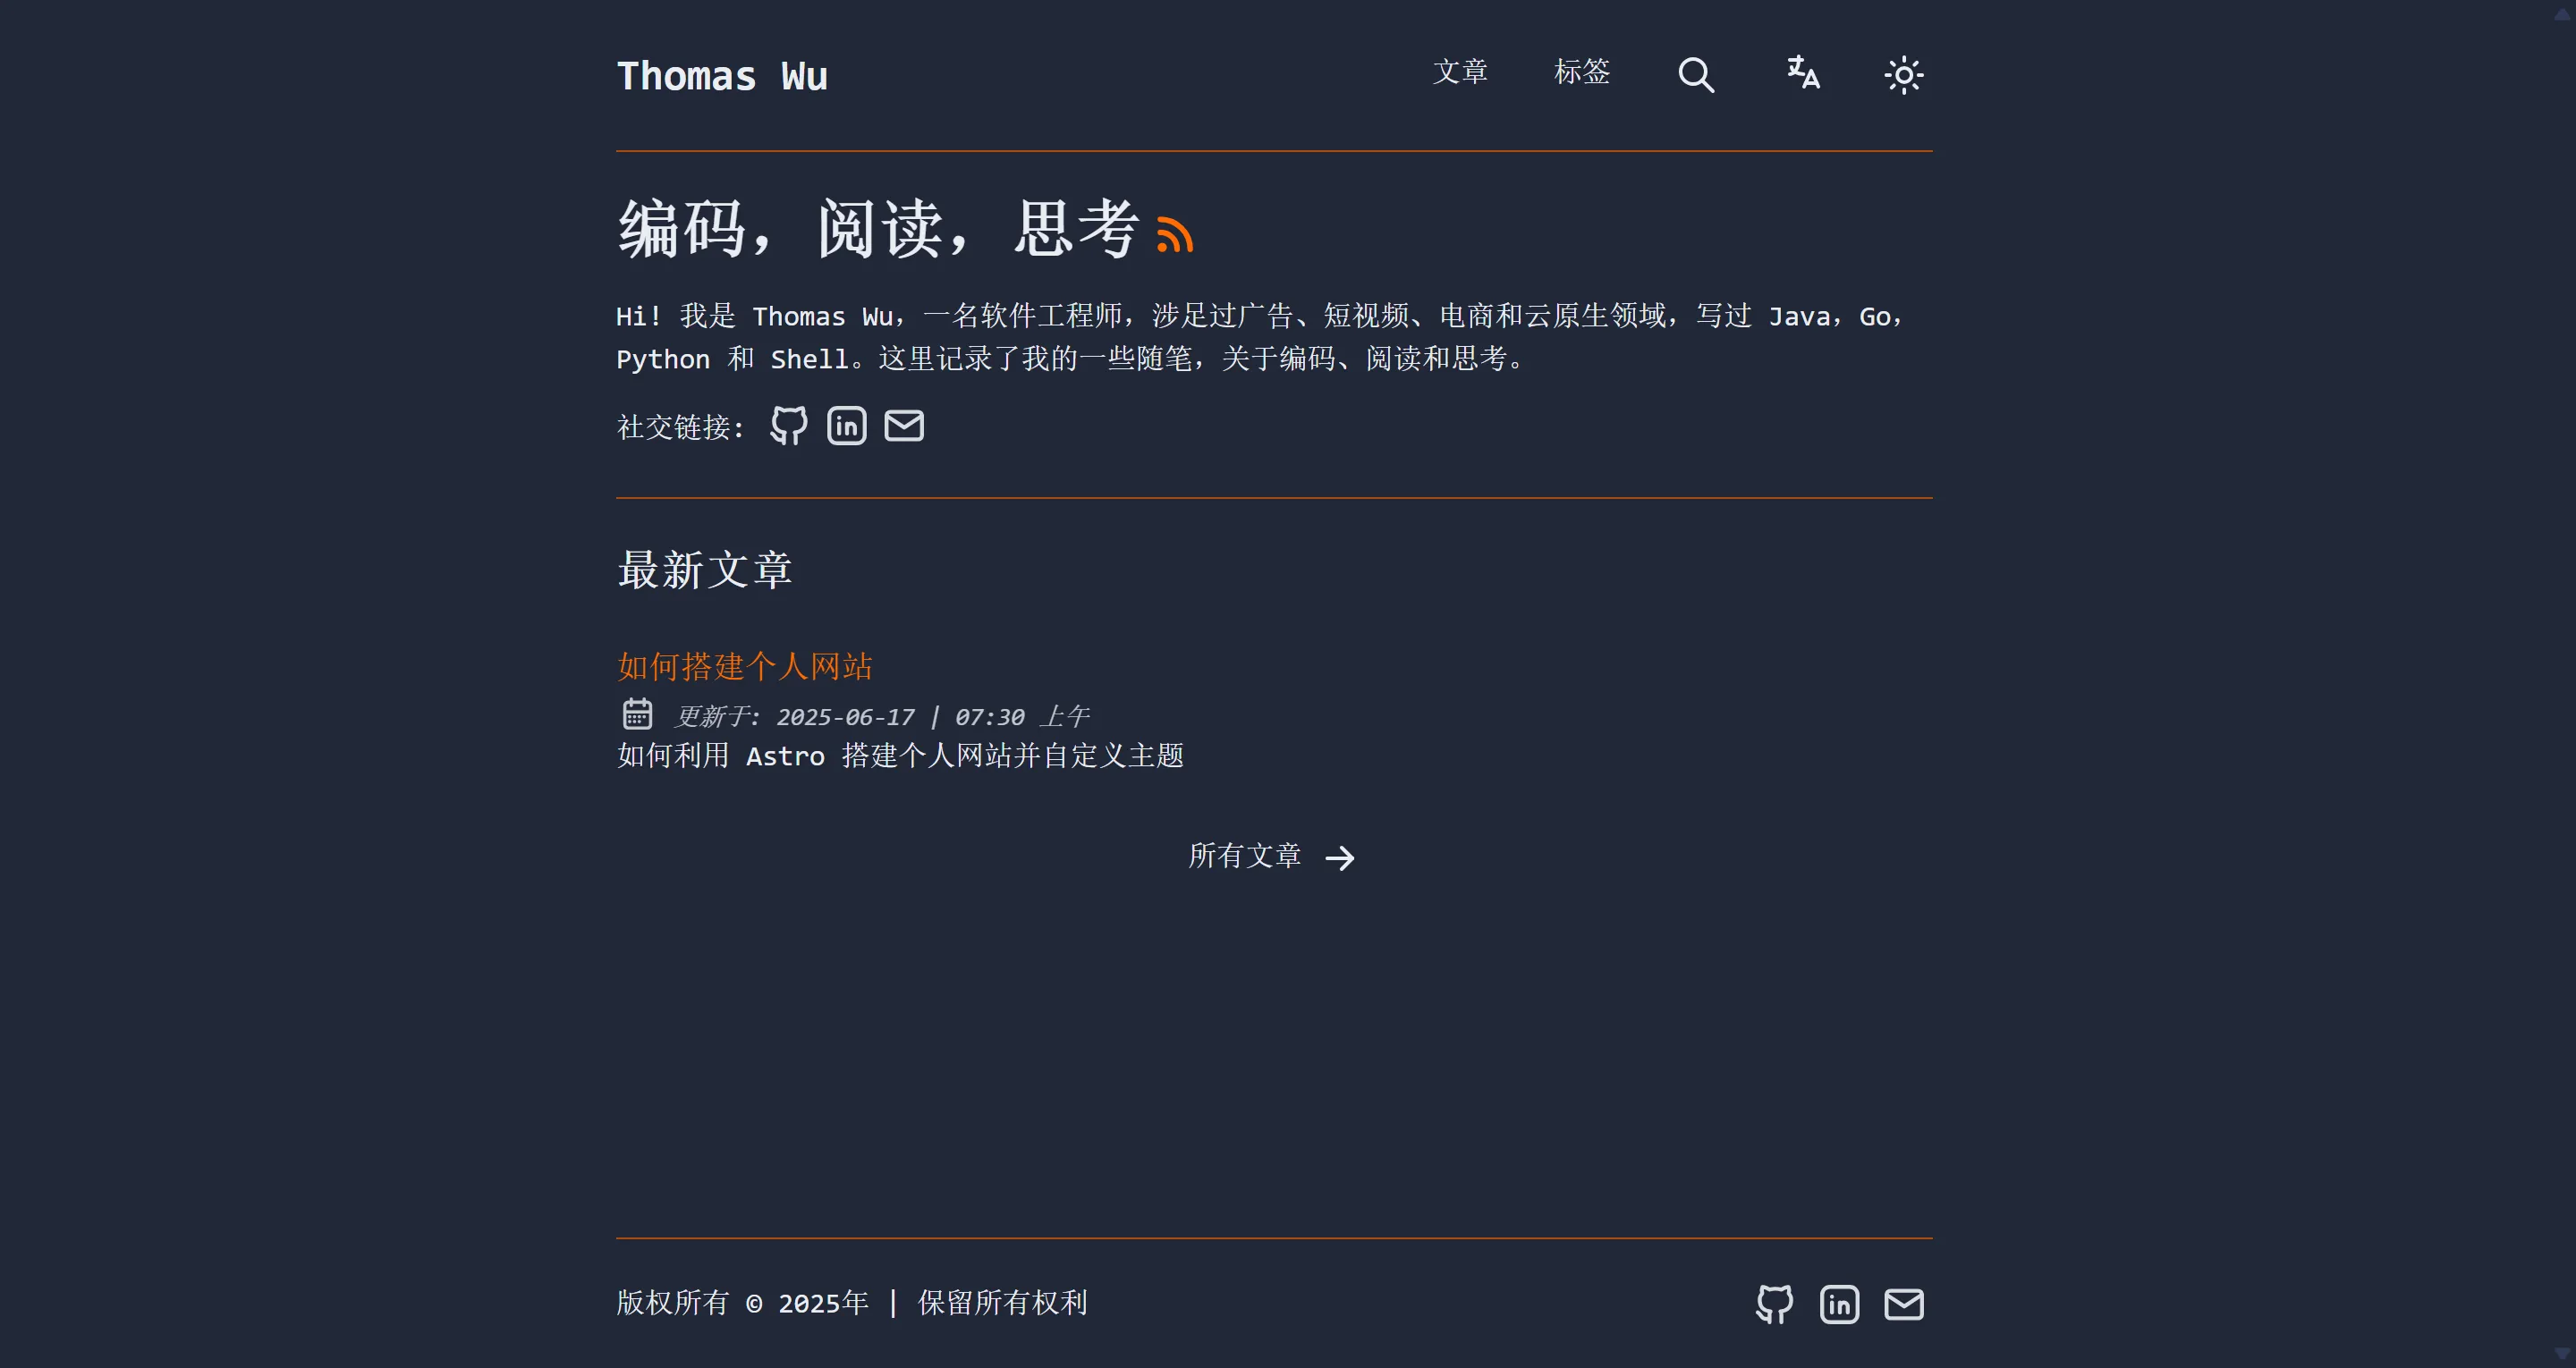
These align well with my needs. Astro’s documentation has a Tutorial: Build a blog detailing how to build a blog from scratch. This tutorial is excellent—even those without frontend experience can complete it. I spent a few evenings on it, and the final result looks like:
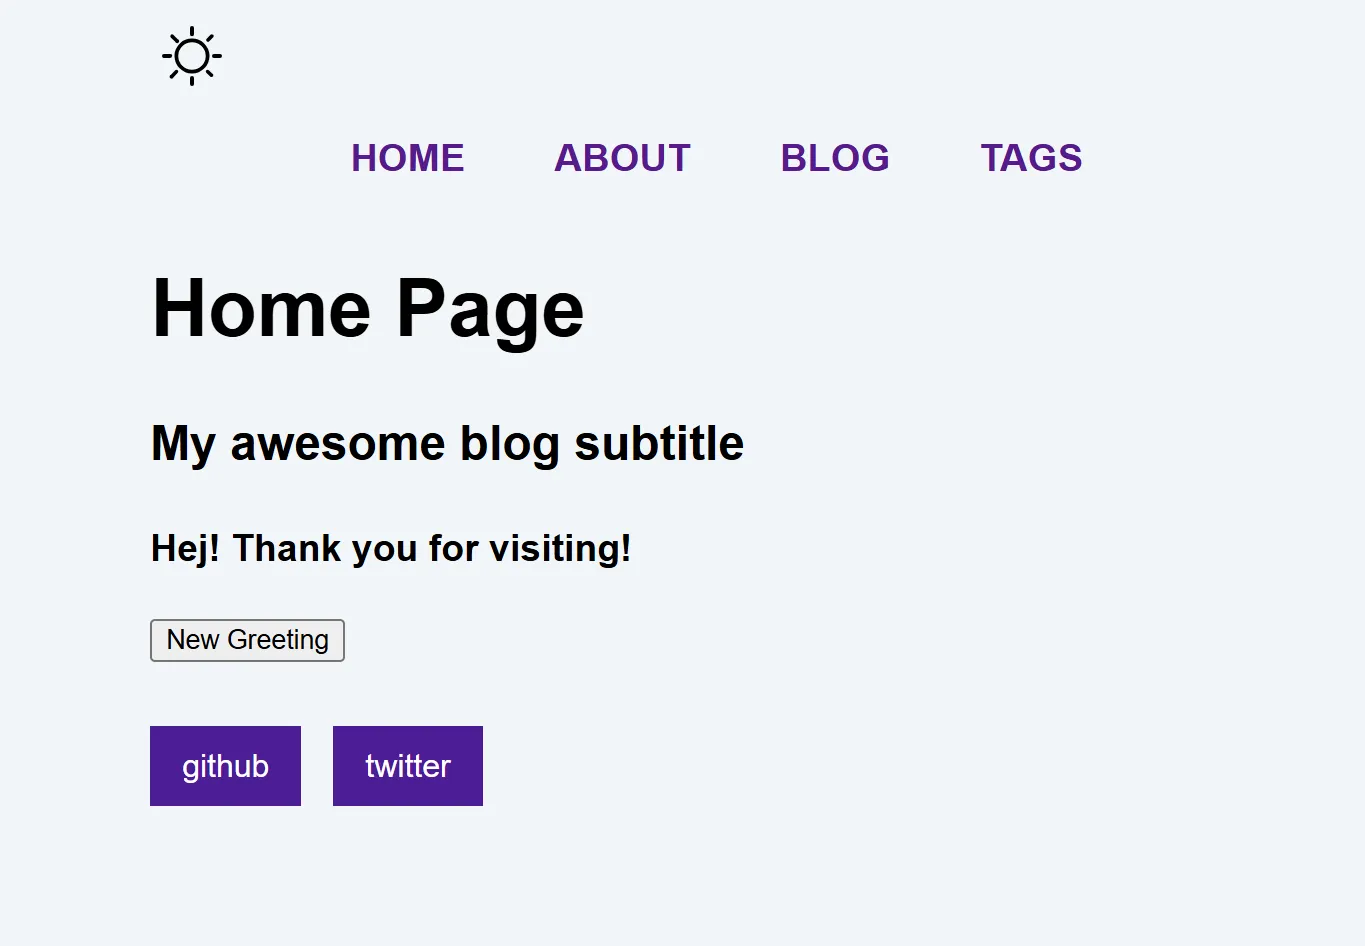 It includes essential blog pages: homepage, about, articles, tags, plus dark mode and social links. It’s functional but looks “plain”—time to enhance its appearance.
Theme
Astro’s official theme library offers many options. After browsing, I chose the AstroPaper I18n theme:
 Key advantages:
- Free
- Clean, content-focused
- Supports internationalization
The third point is crucial—I want my blog to support both Chinese and English. Theme installation and i18n setup can be found in AstroPaper I18n’s documentation. It natively supports Chinese, English, and Arabic—we can keep just Chinese and English by modifying the src/i18n/config.ts config file.
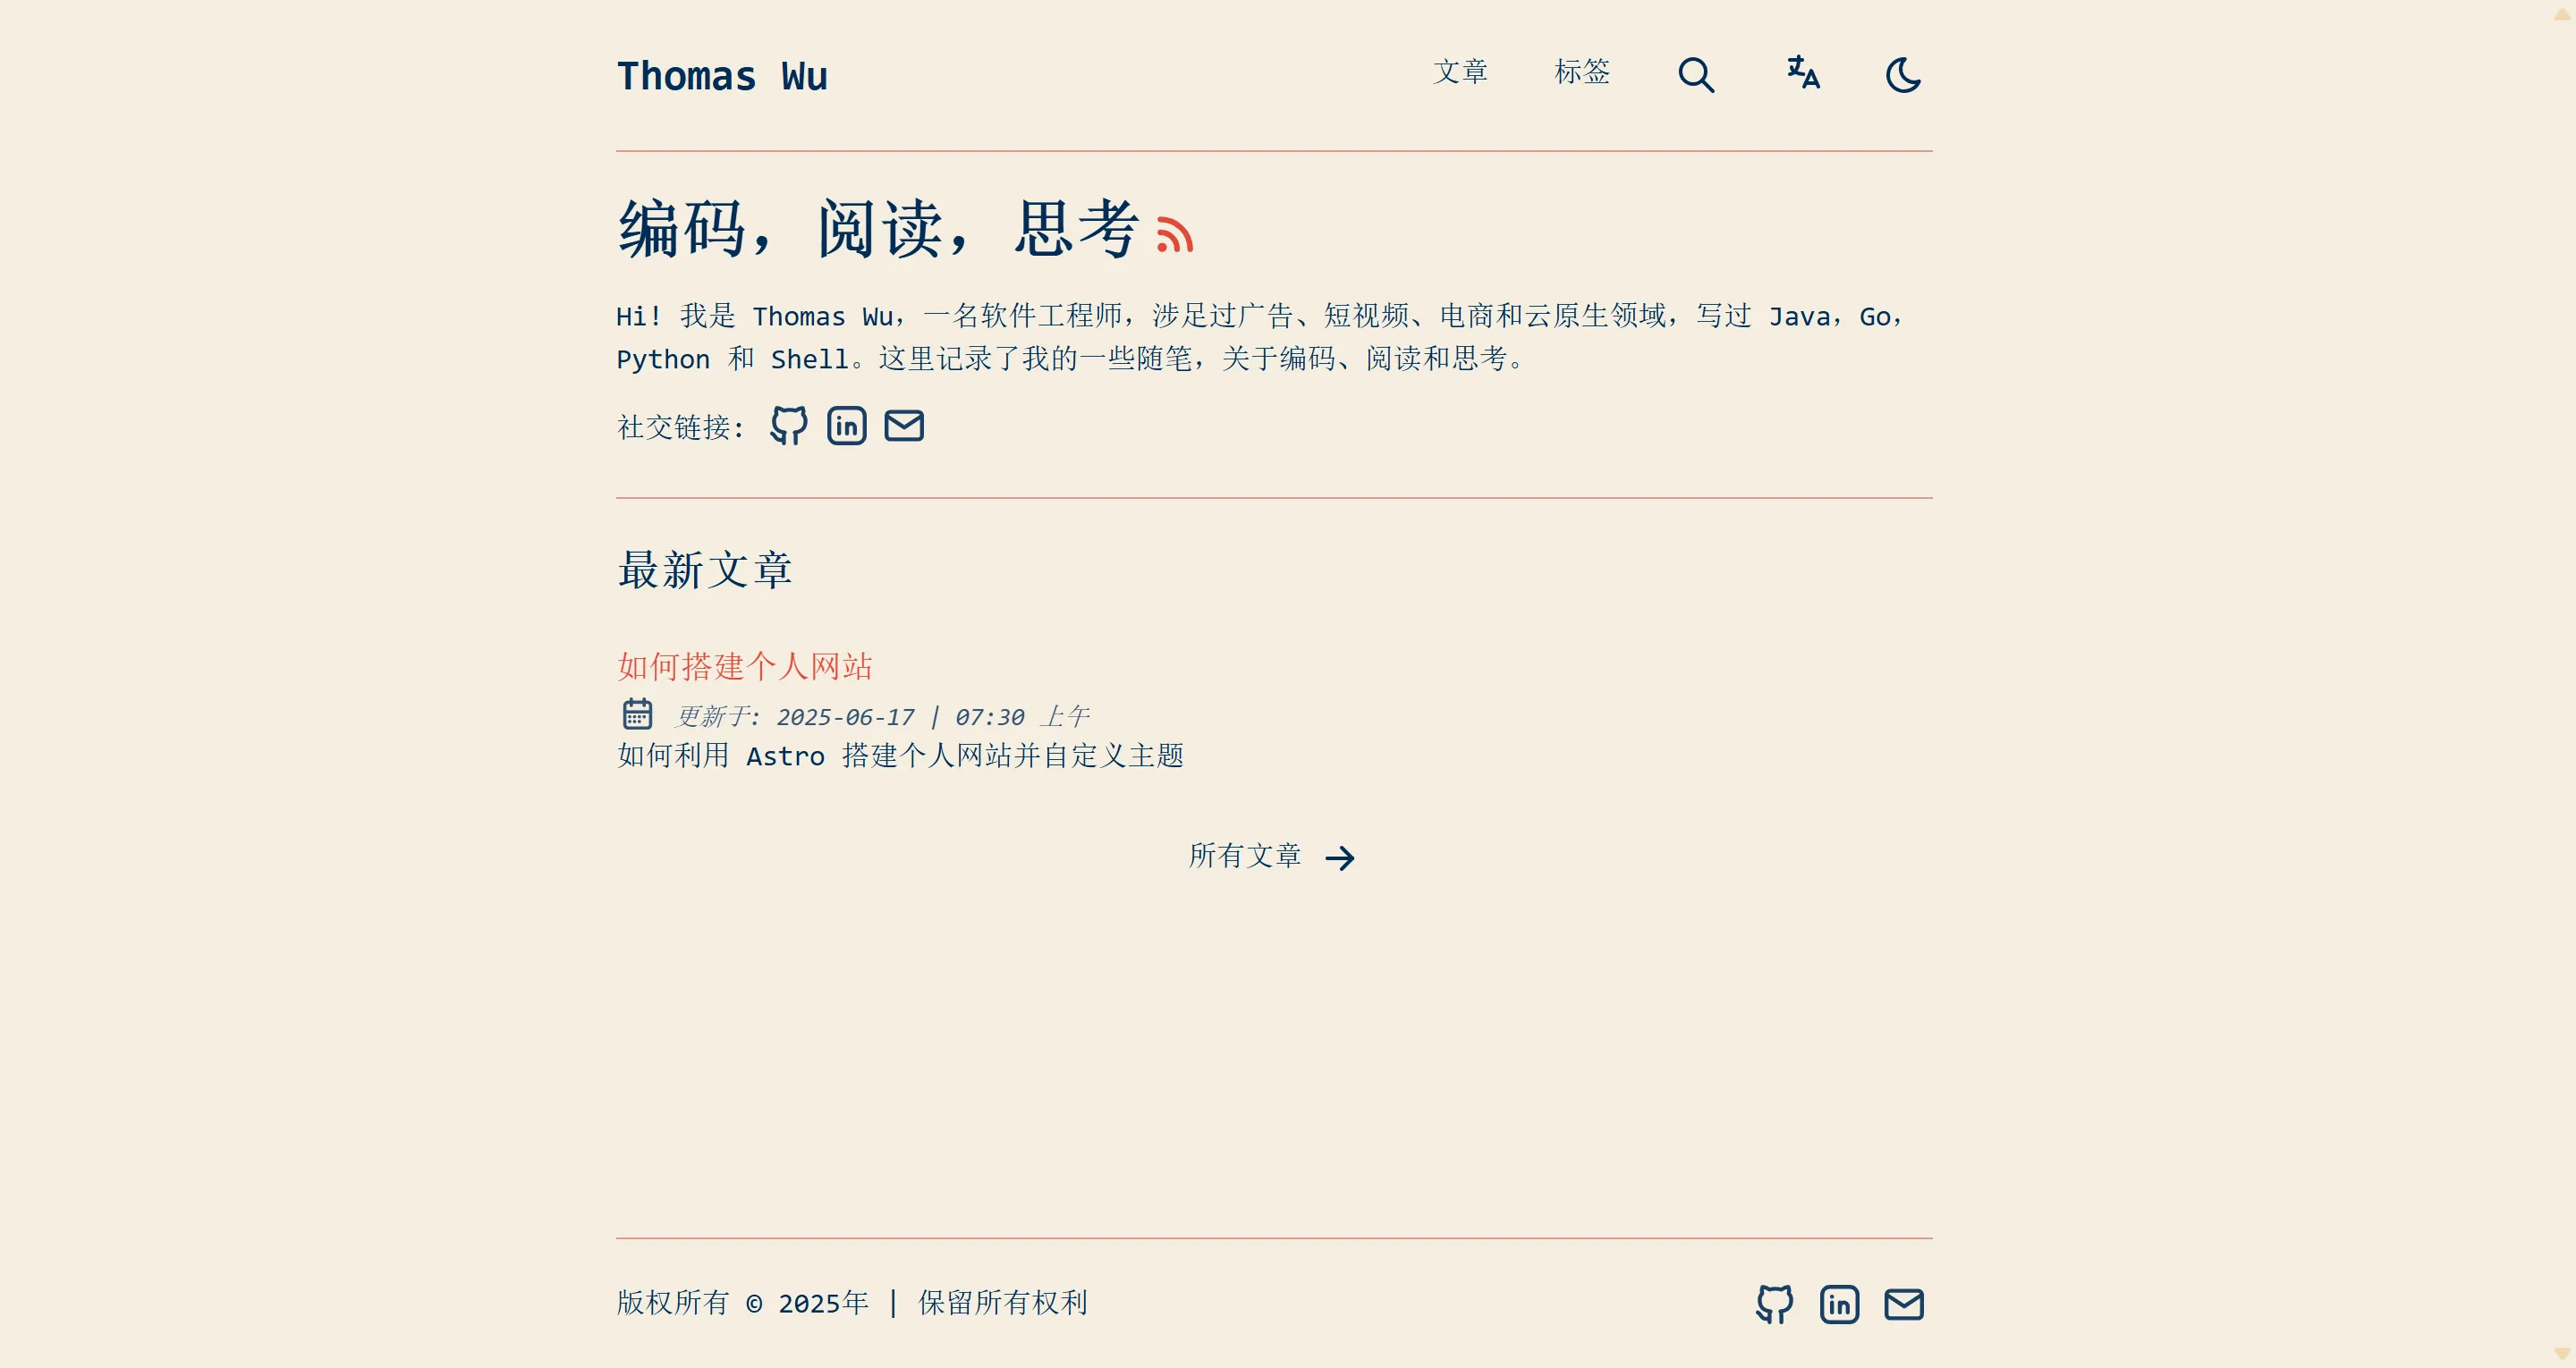
Beyond i18n, this theme’s features are based on the AstroPaper theme. If you don’t need to modify the theme itself, you can start writing articles immediately. Just place Markdown files in src/data/blog, and Astro handles the rest.
Fine-tuning
The AstroPaper theme is clean and aesthetically pleasing, but since the default layout includes all features and template content, there’s room for simplification. My modifications:
- Modified header file
src\components\Header.astro- Removed
AboutandArchivebuttons
- Removed
- Modified homepage file
src\pages\[...locale]\index.astro- Adjusted welcome text content and font size, removed
READMElink
- Adjusted welcome text content and font size, removed
- Modified constants file
src\constants.ts- Updated social links
- Modified date style file
src\components\Datetime.astro- Changed article date format from
22 Mar, 2025to2025-05-02
- Changed article date format from
- Modified global styles file
src\styles\global.css- Tweaked light mode background color
Final result:
Hooks
Astro articles have two datetime attributes: pubDatetime and modDatetime, which we must set manually when modifying articles. AstroPaper’s official article introduces using Git Hooks to automate this. I made some adjustments and added to .husky\pre-commit:
# Loop over each line of the output from the git diff command (added/modified .md files), reading status into "_" and filename into "file"
while read -r _ file; do
    # Extract the YAML frontmatter section (between ---) from the file using awk; the second section is the actual frontmatter
    frontmatter=$(awk -v RS='---' 'NR==2 {print}' "$file")
    # Extract the value of the `draft` field from the frontmatter using grep
    draft=$(grep -oP 'draft: \K.*' <<<"$frontmatter")
    # Get the current timestamp
    now=$(date -u +%Y-%m-%dT%H:%M:%SZ)
    # If draft is marked as 'first', treat it as a first-time publish
    if [[ $draft = 'first' ]]; then
        echo "release $file: pubDatetime: $now, modDateTime:"
        # Replace the draft value with false in the frontmatter
        sed -r -i '/---/,/---/s/^(draft:\s*).*/\1false/' "$file"
        # Update the pubDatetime with current timestamp
        sed -r -i "/---/,/---/s/^(pubDatetime:\s*).*/\1$now/" "$file"
        # Clear the modDatetime value
        sed -r -i '/---/,/---/s/^(modDatetime:\s*).*/\1/' "$file"
        # Stage the modified file in git
        git add "$file"
    # If draft is false, it's a published post being updated
    elif [[ $draft = 'false' ]]; then
        echo "update $file: modDatetime: $now"
        # Update the modDatetime with current timestamp
        sed -r -i "/---/,/---/s/^(modDatetime: ).*$/\1$now/" "$file"
        # Stage the updated file in git
        git add "$file"
    fi
# Feed the list of staged Markdown files (added or modified) into the while loop
done < <(git diff --cached --name-status | grep -P '^(A|M).*\.md$')
Deployment
With all modifications complete, only deployment remains. Astro’s official tutorial covers automatic deployment using Netlify Deploy your site to the web:
- Push Astro code to a GitHub repository
- Register a Netlify account and link the GitHub repository
- Netlify automatically deploys on every GitHub repository update
Netlify configuration page:
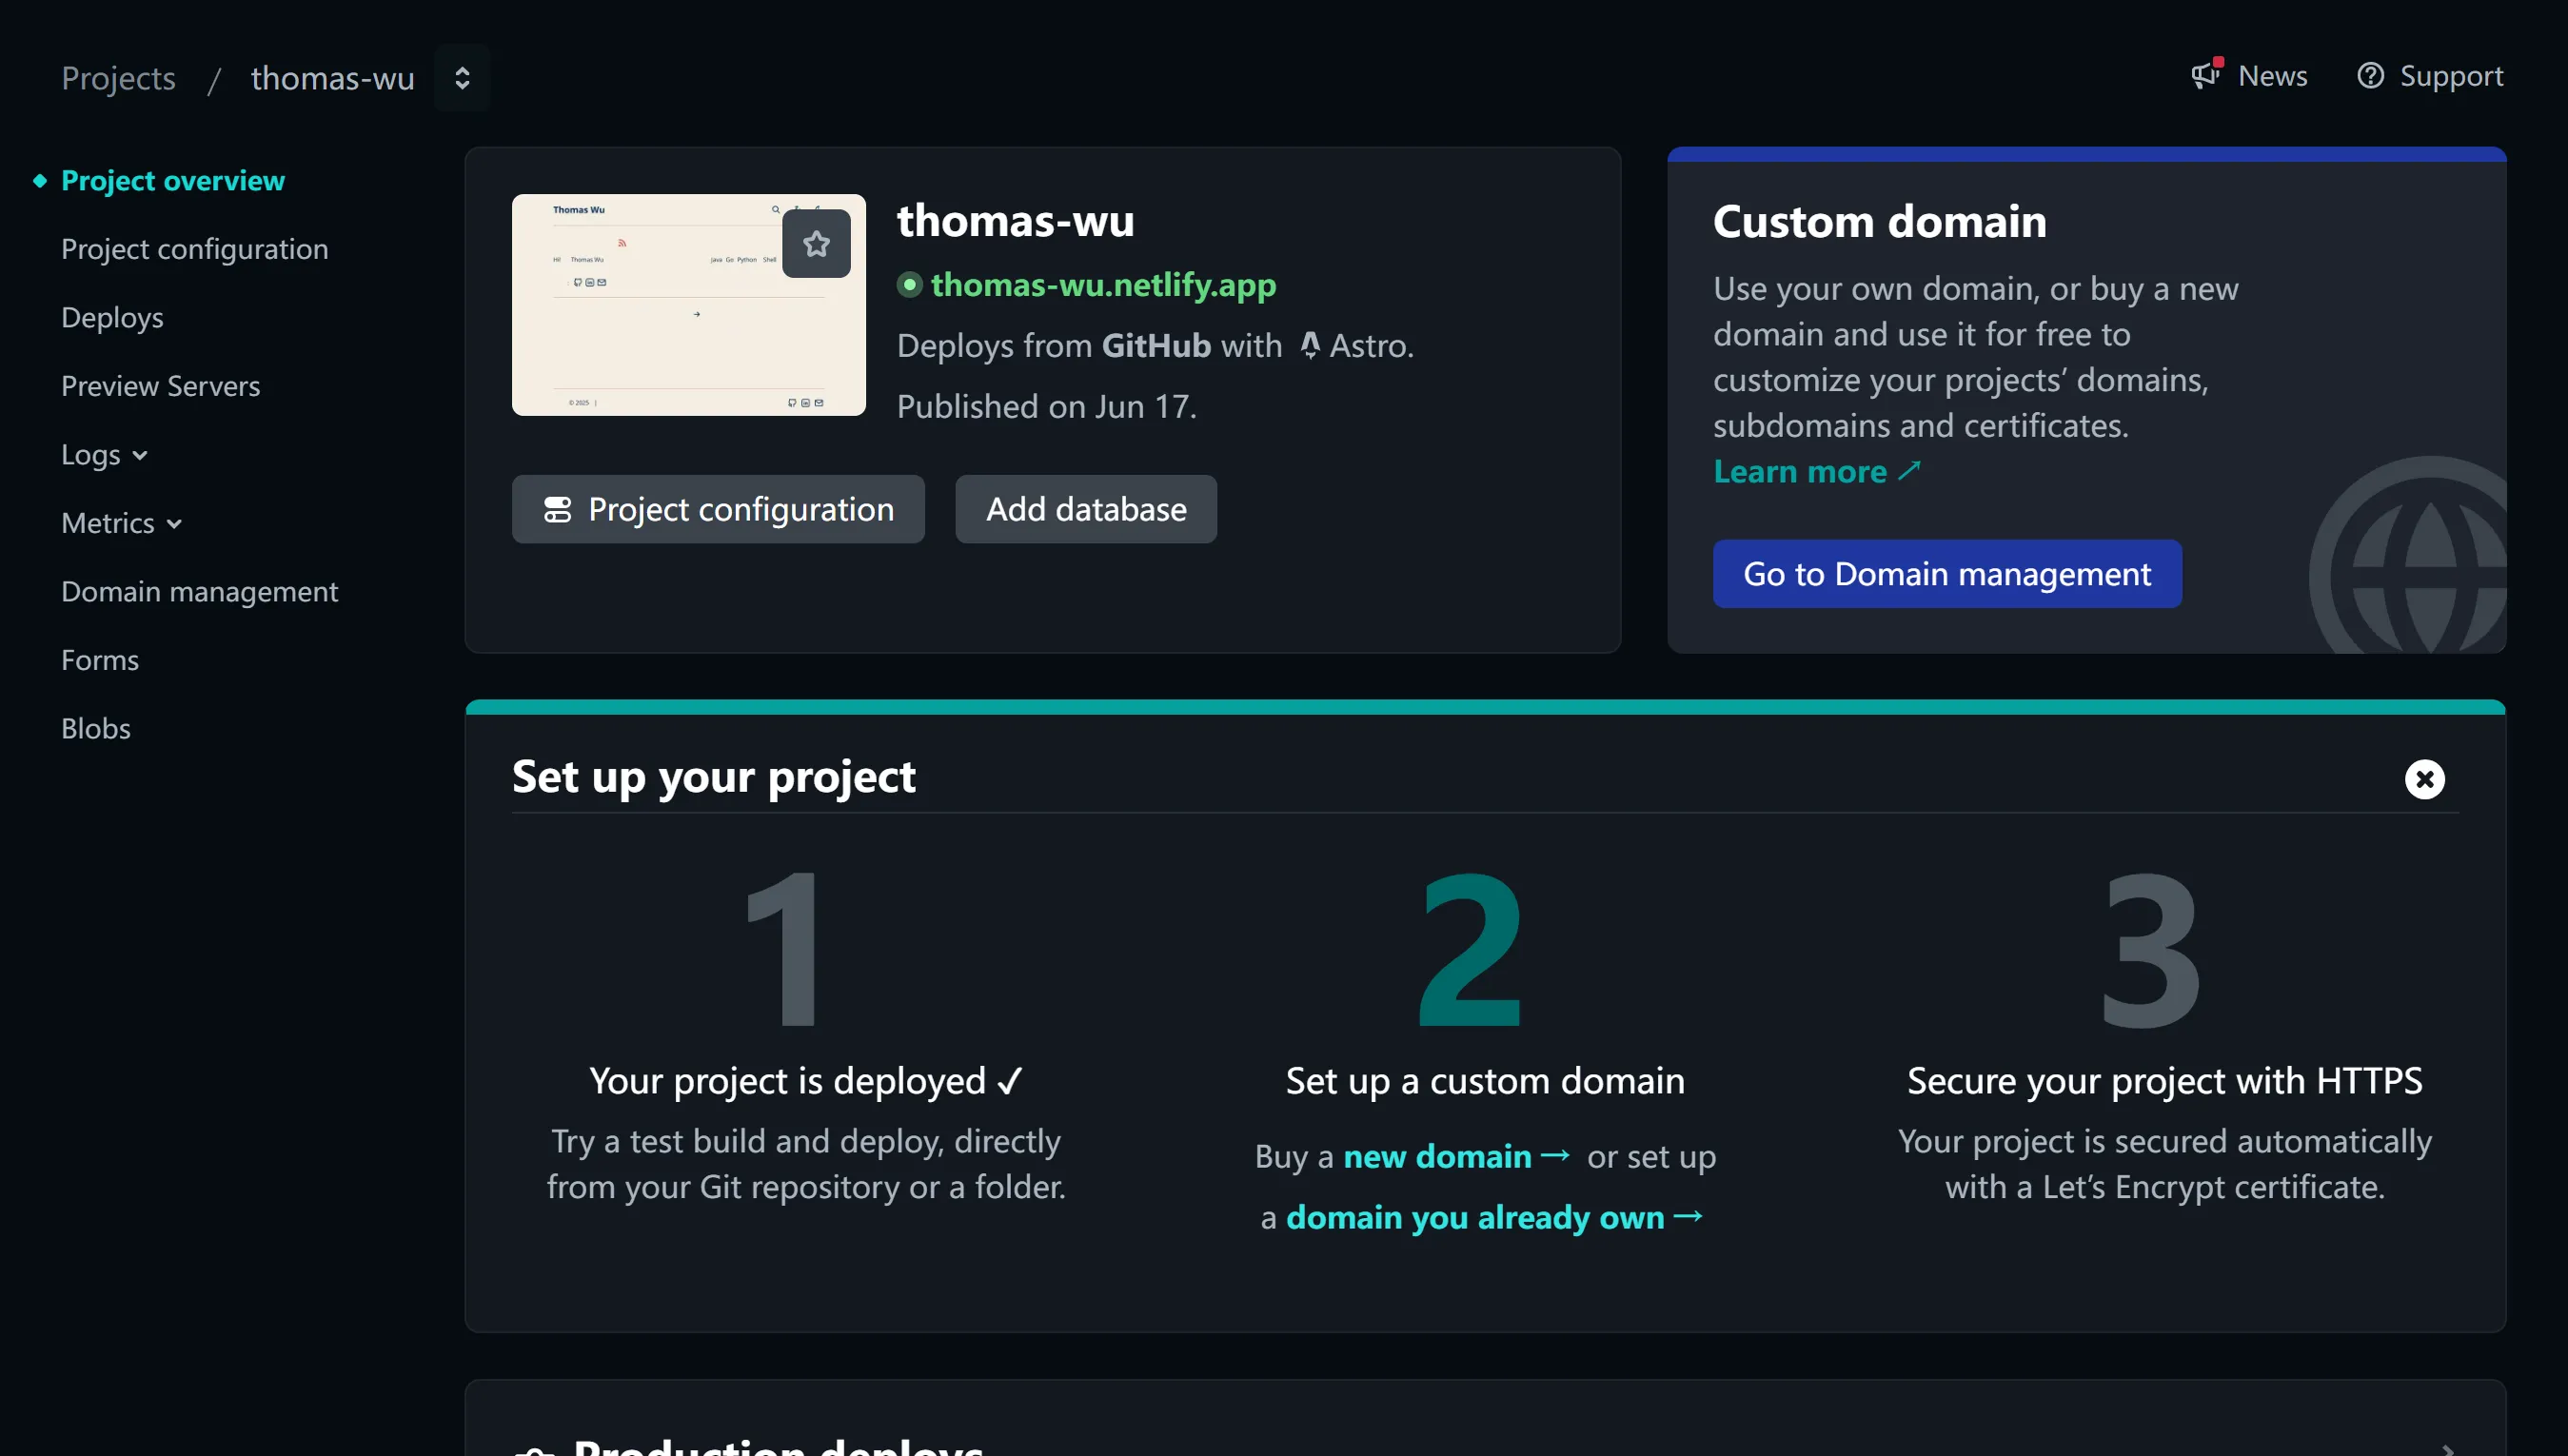 Click the project domain to visit your blog.
Our personal website is now live!